

Introduction
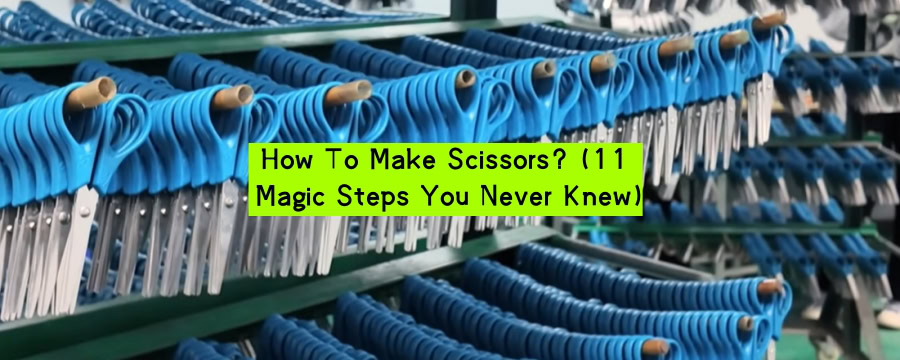
How to make scissors? Behind this seemingly simple question, there is a series of fine craftsmanship and wisdom. From a piece of cold steel to an indispensable universal assistant in our lives, every step has been carefully polished. Today, we will unveil the mystery of scissor-making and see how this indispensable gadget in daily life has been created from scratch and finally become a capable assistant in our hands.

Steps on how to make scissors
Scissors are common tools in our daily lives, but their production process is full of precise design and complex craftsmanship. Below, we will analyze the production process of scissors step by step from the perspective of how factories make scissors.
Step 1: Blade cutting and punching
The first step in making scissors is to make the blade. Factories generally use high-carbon steel or stainless steel as raw materials. After all, these materials are hard enough and can withstand wear and tear. First, a piece of steel plate is sent to a large stamping machine. There is a mold in the stamping machine, which uses high pressure to press the steel into the basic outline of the blade. After this step is completed, the shape of the blade is considered to be completed.
Step 2: Blade punching for assembly
After the initial shaping of the blades, the factory will punch holes in the connection of the blades. This hole is used to install rivets or screws during subsequent assembly so that the two blades can open and close flexibly. The punching process requires extremely high precision to ensure that the scissors will not get stuck or loose when in use.
Step 3: Preliminary grinding and polishing
After punching, the surface and edge of the blade are still relatively rough. The factory will use a belt sander or polisher to perform preliminary grinding on the blade to remove burrs and uneven parts, making the blade smoother.
Step 4: Trimming assembly holes
Use special tools to trim the assembly holes on the blade to ensure that the size and shape meet the requirements. Rivets or screws are installed during subsequent assembly so that the blade can open and close flexibly.
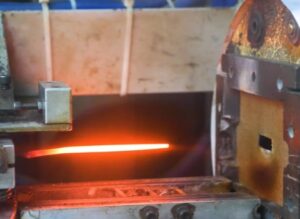
Step 5: Heat treatment and quenching
To improve the hardness and durability of the blade, the blade needs to be heat-treated and quenched. First, the blade is heated to a high temperature (usually over 800°C) and then quickly immersed in a coolant (such as water or oil) for quenching. The heat-treated blade can remain sharp for a long time and is not easy to deform.
Step 6: Fine grinding and polishing
After heat treatment, a layer of oxide scale will form on the surface of the blade, and the edge may also become rough. Therefore, the factory will finely grind and polish the blade again. This step not only makes the surface of the blade smooth but also further optimizes the sharpness of the blade. The polished blade is close to the finished product, and both the appearance and performance meet the standards.
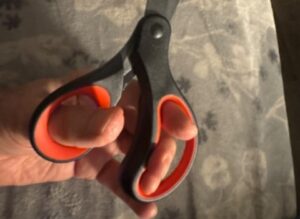
Step 7: Handle injection molding
The handles of scissors are usually made of plastic or rubber. The molten plastic is injected into a designed mold and cooled to form the shape of the handle. The design of the handle needs to consider ergonomics to ensure that the user is comfortable to hold when using it.
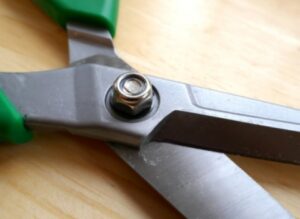
Step 8: Assembling scissors
The two blades are connected with rivets or screws through pre-punched holes, and the screws are tightened to ensure smooth and secure opening and closing of the scissors.
Step 9: Laser engraving
The factory will perform laser engraving on the blade or handle to increase brand recognition and aesthetics of the scissors. Laser engraving can accurately engrave the brand logo, model, or other patterns. This step not only improves the scissors’ appearance but also increases the added value of the product.
Step 10: Debugging and calibration
After assembly, workers will manually test the opening and closing smoothness and cutting effect of each pair of scissors to ensure that they meet the standards. If problems are found, they will be fine-tuned until the scissors reach the best state of use.
Step 11: Packaging
The scissors that pass the inspection will be cleaned and packed into the packaging box. The packaging not only protects the scissors from damage during transportation but also improves the overall image of the product.

Difficulties in making scissors
The production of scissors may seem simple, but it involves many delicate technical difficulties. The following are common technical difficulties and their solutions in the production of scissors:
1.Blade sharpness and durability
Difficulty:
- The blade of the scissors needs to be sharp enough to cut the material easily, but it also needs to be durable to avoid frequent wear or chipping.
Solution:
- Choose high-carbon steel or stainless steel as the material, which is hard and wear-resistant.
- Through a precise heat treatment (quenching and tempering) process, the blade can achieve the best hardness and toughness.

2.The heat treatment process of blades
Difficulty:
- Too high a temperature or too long a time will make the blade too brittle and easy to break; too low a temperature or insufficient time will make the blade hard enough and easy to become blunt.
Solution:
Use advanced temperature control equipment to ensure the accuracy of the heating and cooling process.
Sampling and testing of each batch of blades to ensure that the heat treatment effect meets the standards.
3.Comfort and durability of the handle
Difficulty:
- The handle needs to be ergonomically designed to make it comfortable for users to hold, and it must also be durable to avoid cracking or deformation after long-term use.
Solution:
Use high-quality plastic or rubber materials to make the handle to ensure its durability and comfort.
Treat the handle with an anti-slip treatment, such as adding texture or using a soft rubber coating.
4.Connection accuracy between blade and handle
Difficulty:
- The two blades of the scissors need to be connected by rivets or screws. If the connection is too tight, the scissors will be difficult to open and close; if it is too loose, they will shake, affecting the cutting effect.
Solution:
Use high-precision punching equipment to ensure the size and position of the connection hole are accurate.
Perform multiple adjustments during the assembly process to ensure that the tightness of the connection point is appropriate.
FAQ
How to make scissors sharp?
If you want to make scissors sharper, you should learn how to sharpen them. There are many ways to sharpen scissors, such as using a file, a whetstone, a needle, sandpaper, etc. If you want to know the specific steps to sharpen scissors, you can refer to How to sharpen scissors?
Why do scissors blades rust?
The iron in the material usually causes rust on the blade. If you leave the scissors in a humid environment for a long time, the iron will oxidize when it comes into contact with moisture and oxygen, and the scissors will rust.
How to prevent scissors from rusting?
- Choose stainless steel or rust-resistant coated scissors, and wipe them dry immediately after use.
- Clean the blades regularly to remove residues.
- Store in a dry environment, use a protective cover, or hang them.
- Check for rust regularly, and light rust can be sanded and oiled.
What materials are scissors made of?
High-carbon steel and stainless steel are common materials because they are hard and wear-resistant. Some high-end scissors may use titanium alloy or other special materials.
Can the blades of scissors be replaced?
Most scissors have fixed blades that are not replaceable, especially household or general scissors. However, some tailoring scissors, gardening scissors, or industrial scissors may have replaceable blades to extend the overall life of the scissors after the blades are worn. If the blades of your scissors are damaged, it is recommended to check the product manual or consult the manufacturer to confirm whether the blades can be replaced.
Why do scissors need a certain curvature on their blades?
Improve cutting efficiency: The curvature makes the blades easier to cut, especially for thicker or harder materials.
Prevent material slippage: The curvature design can prevent slippage or displacement during cutting, ensuring the accuracy of cutting.
Reduce wear: The curvature makes the force on the blade more uniform, avoids local excessive wear, and extends the service life of the scissors.
Ergonomic: The curved blade can reduce hand fatigue and improve comfort when in use.
Conclusion
Although scissors are just a small tool, their production process is not simple at all, and every step is full of wisdom. From the grinding of the blade to the shaping of the handle, and then to the final debugging, every step must be treated carefully, so that it can eventually become a powerful assistant in our lives.


One Response
This article is good, I am trying to modify the old scissors and DIY a new pair myself.